Mounting flexible solar panels involves applying an adhesive to the back of the panel and pressing it onto the desired surface, usually a roof or deck of an RV, boat or van. It''s essential to clean and prep the surface ahead

This is the most comprehensive solar panel mounting video article, including videos of various mounting brackets. For example, how to use the balcony to install solar panels. This includes iron sheet/ground roof solar panel bracket
A crucial step if you''re going for a fixed installation includes mounting your solar panels. This DIY guide covers how to mount rigid rooftop solar panels. You''ll find everything you need to know, from the components

The installation steps of the large-span flat single-axis tracking type flexible photovoltaic bracket system of the embodiment are as follows: after the foundation part is installed on site, a
The flexible brackets for photovoltaics application has been unveiled by DAS Solar. High flexibility . Compared to traditional brackets, the DAS Solar flexible bracket is loaded primarily by tension cables. Through
First, install the solar panel mounting brackets, choosing between roof-ground or flush mounts based on your needs, ensuring stability for both monocrystalline and polycrystalline panels. Orient panels towards the sun: south in the Northern
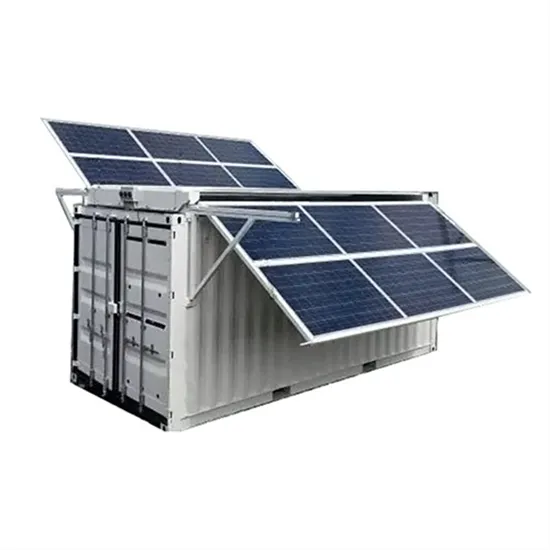
Flexible Solar Panel Mounting System. The flexible photovoltaic support originates from the roof of suspension structure and glass curtain wall. It is a photovoltaic support system supported by
Elevate your solar installation with our versatile Solar Panel Mounting Brackets. Ideal for metal, flat, and corrugated roofs, our brackets offer sturdy support. As a leading manufacturer, we provide quality solutions for every solar need.
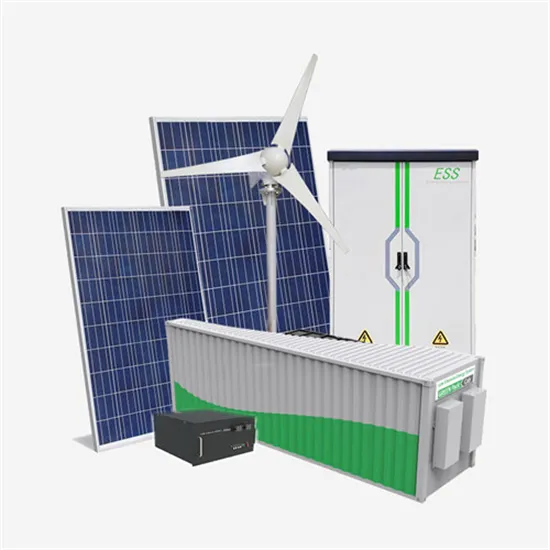
One key component in a 12 volt solar system is the solar panel. These panels are responsible for converting sunlight into electricity through the photovoltaic effect. The wiring diagram will show

Solar panel installation guide for UK homes With renewable energy proving to be a great way to reduce carbon emissions, solar panels have become a popular choice for harnessing the power of the sun. In this guide, we''ll walk you
2. Attach the Fixing Bracket to the Solar Panel. Once you''ve gathered all the tools and followed up on permits and safety requirements, it''s time to set up your mounting system. The first step is to attach the fixing
Solar panel installations must be meticulously performed under the supervision of a professional who understands the steps of installation. This would ensure time and energy efficiency in the process and avoid last-minute
Step 2: Connect Mounting Brackets to Each Solar Panel and Set them Aside. The next step is to attach mounting brackets to each solar panel. As earlier mentioned, the RV solar panel mounting process may differ
While it seems simple to mount a flexible solar panel, common installations such as sealing around the edges of the solar panel and direct adhesion of the solar panel to a surface using Sikaflex and most other adhesives WILL damage the solar panel AND void your warranty, please continue reading the guide for more details.
The purpose of installing the bracket is to better fix the solar panel. If there is a more convenient and feasible method to fix the solar panel. PVMars will definitely recommend it to you, and effective solutions are based on solar panels’ characteristics and your on-site installation environment.
Press the panel down firmly, ensuring a solid bond between the panel and the surface. The good news is that flexible solar panels use the same wiring methods as any other solar panel. Choose between a series or parallel connection based on your individual power needs. Once connected, route your cables to the solar controller.
EcoFlow’s rigid solar panels come with a Tilt Mount Bracket for easy rooftop installation. The components include four fixing brackets, two adjustable brackets, and screws. This should be all you need to mount rigid solar panels on the roof or any other flat surface on your home that receives direct sunlight.
The first step is to attach the fixing bracket to the solar panel. Lay the solar panel face-down on the tarp or canvas to protect the photovoltaic surface. You want to be sure the mounting holes on the back of the panel align with the holes in the fixing bracket. Don’t modify the module frame because doing so may void your manufacturer’s warranty.
There are multiple options for mounting your solar panels. The best option for you is most likely the flat surface on your home that receives the maximum exposure to sunlight. For irregular surfaces, you can augment your rigid solar panel array with flexible solar panels.